


Picking the right people to approve requests is crucial for smooth workflow in organizations. This article focuses on two common ways – letting customers choose approvers and setting default approvers. We also suggest our preferred method which is using project roles, automation, and APIs. By knowing the pros and cons of each approach, organizations can improve their approval processes.
Loose: Allowing customers to select approvers
This approach allows customers to select the approvers for their requests. When submitting a request, customers can specify who they believe should approve their request. See this article for the how.
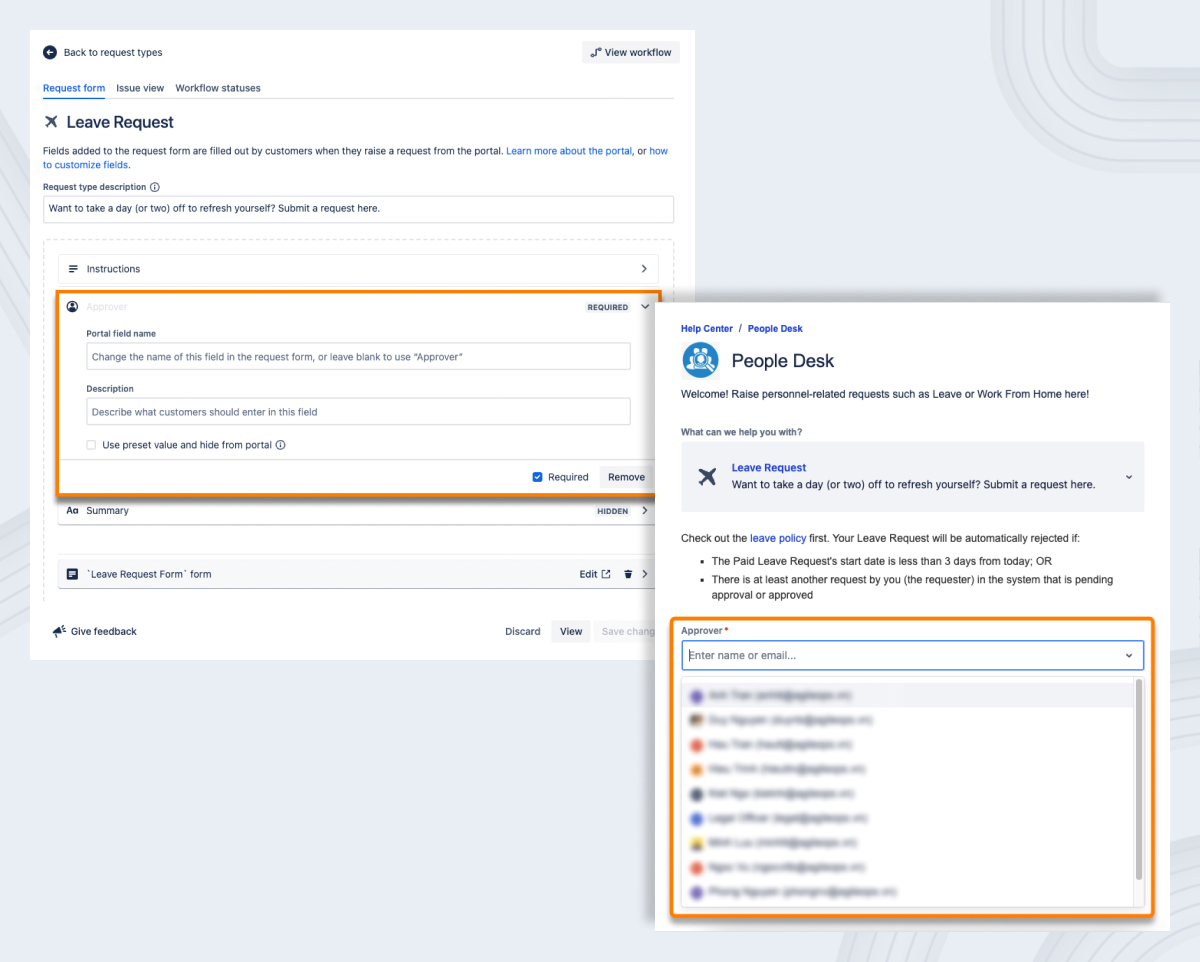
Let the customers choose the approver(s)
Pros
Flexibility
Customization
Improved communication
Cons
Potential delays
Inconsistent choices
Risk of inappropriate choices
Tight: Configuring Default Approvers
Alternatively, you can set default approvers in advance for certain request types or categories. With this approach, you define a predefined set of approvers for specific types of requests. Whenever a customer submits a request falling under a particular category, the default approvers are automatically assigned. See this article for the how.
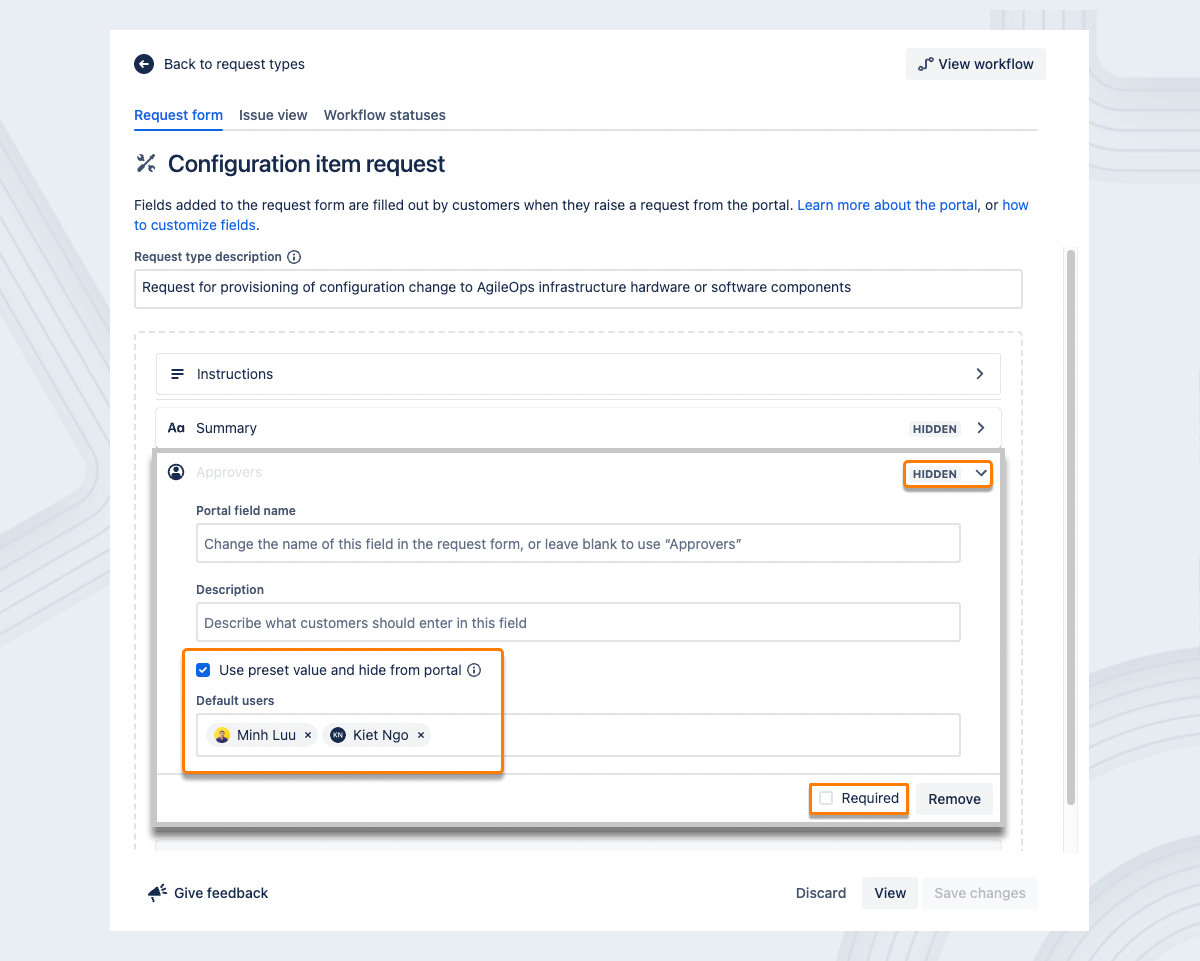
Presetting the approvers and hiding the Approver(s) field from the portal
Pros
Streamlined process
Consistency
Reduced decision-making burden
Cons
Limited customization
Lack of transparency
Difficulty accommodating exceptions
Dynamically: Utilizing project roles, automation, and APIs to set Approvers
At AgileOps, we actually configure approvers the third way, using project roles, automation, and APIs.
With this solution, the final result will be:
The customer raises a request
Jira automatically pulls a pre-defined set of users from the "Approvers" project role and sets them as the approvers of the request
Whenever the approvers are changed (there is a new approver or an existing approver leaves the company), the project admin just needs to edit users in the "Approvers" project role
Here is how it’s set up:
Step 1: Create the “Approvers” project role
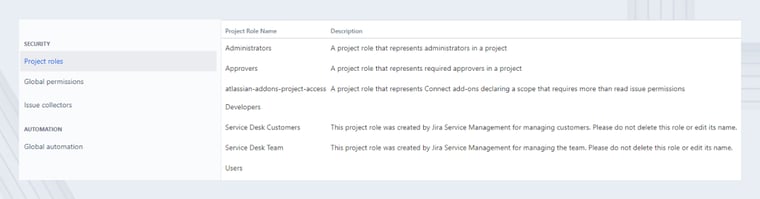
Go to System > Project roles (under the Security section)
Click Add Project Role
In the Name field, enter Approvers
In the Description field, enter a brief description of the role
Click Add Project Role
Step 2: Add users to the “Approvers” project role
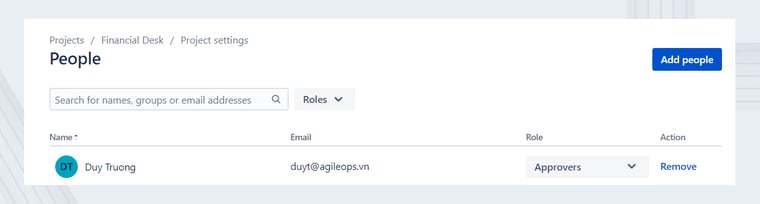
Go to your project settings and open the People section
Click on Add people
Enter the usernames of the users you want to add as approvers
Choose the role Approvers
Click on Add
Step 3: Retrieve the approvers when a new ticket is raised
Go to your project settings and open the Automation section
Click on Create rule
Set the trigger to be Issue created
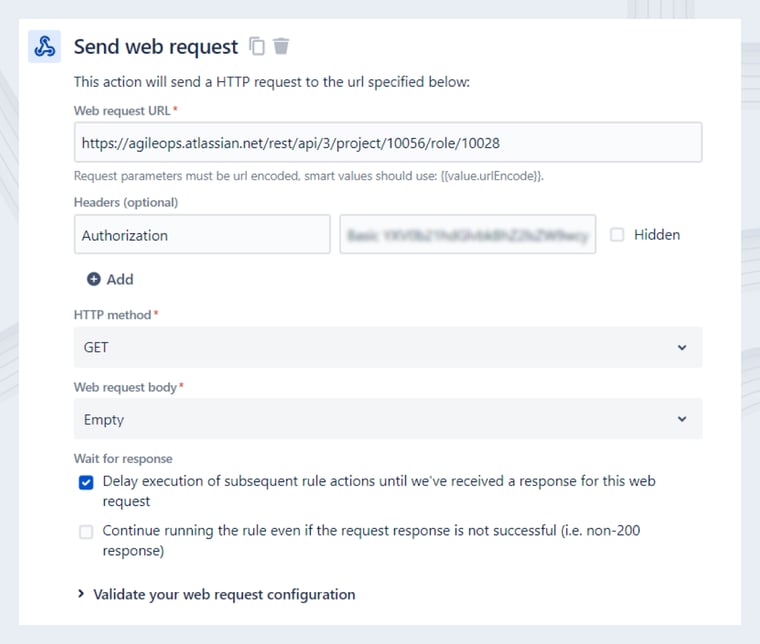
Set an action to Send web request
Configure the web request to retrieve users currently having the project role “Approvers” through Jira API (see here for detailed documentation)
Step 4: Format the web request response

Add an action to Create variable
Set a Variable name (in this case is allAccounts)
Define the smart value to format the web request response:
{{webResponse.body.actors.actorUser.asJsonObjectArray("accountId")}}
Step 5: Edit Approvers field of the ticket

Add an action to Edit issue
Edit the field Approvers (custom field with the ID 10003) with the smart value allAccounts
Step 6: Notify Approver through Slack
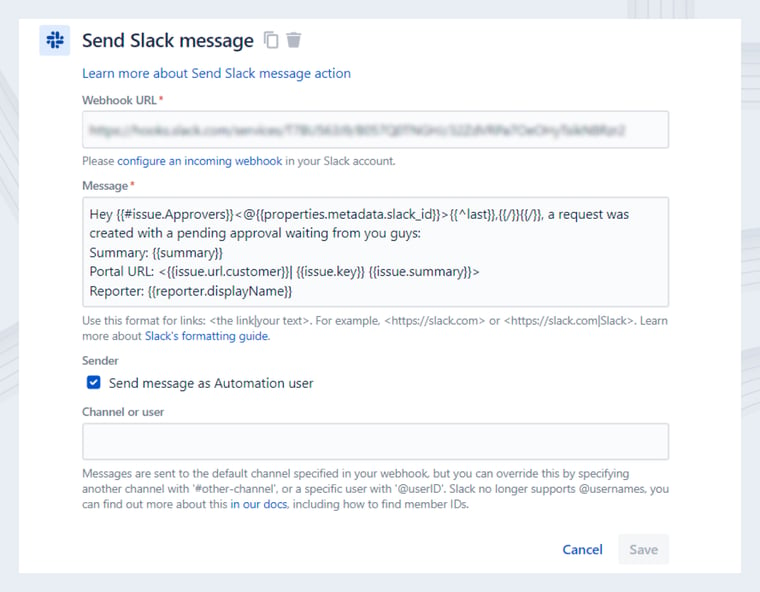
Add an action to Send Slack message
Configure the message to notify the approver(s) that there is a request pending their approval using the syntax:
{{#issue.Approvers}}<@{{properties.metadata.slack_id}}>{{^last}},{{/}}{{/}}Save the rule and turn it on
Step 7: Action - Approver for ticket is set and notified
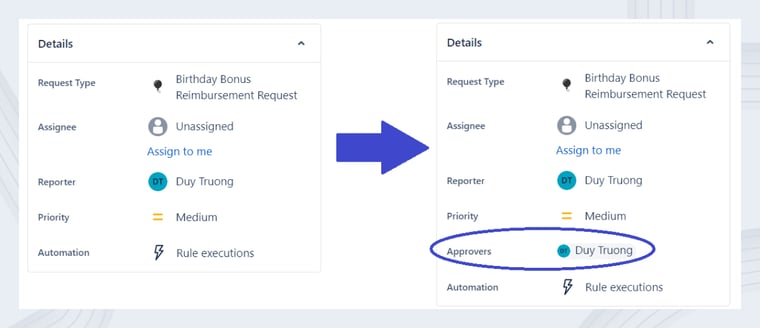
Now, when a new ticket is created, the Approvers field is automatically populated with users with the Approvers project role. They will also receive a notification on Slack.

The biggest cons of this approach is, you guessed it, the complexity of setup: It requires configuring automation rules and custom scripting, which may require technical expertise and effort. But the advantages are well worth it.
Consistency and scalability
Streamlined process
Reduced manual errors
In this article, we explore three approaches to designate request approvers, each having its own set of pros and cons. Allowing customers to pick approvers adds flexibility but may cause inconsistent and delayed approvals. Alternatively, opting for default approvers streamlines the process but might be inflexible and challenging for exceptions.
Optimizing approval workflows becomes seamless with automation rules and APIs tailored for users designated as 'Approvers' in project roles. This not only fosters consistency and efficiency but also propels organizations towards faster and more successful goal accomplishment.
🍿 View the full article Eliminate Guesswork: Configure Approvers on-the-fly in Jira Workflows.